Long story short: I have very wide and very short feet, I prefer zero-drop shoes, and I also really dislike spending more than $40 on a pair of shoes whose sides I’m just going to shred as my wide foot strains against the walls of the shoe that doesn’t flop about and give me blisters. Last time I went show shopping, I spent two hours in DSW, and came away with a very functional, but also incredibly unattractive, pair of work shoes.
I’ve been saying for years that I need to just make my own shoes, so that I can adjust the fit to suit my wide foot. And I recently took the plunge. I didn’t document my process (shame on me) with my test pair, but here they are:
-
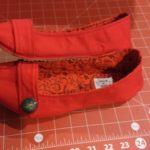
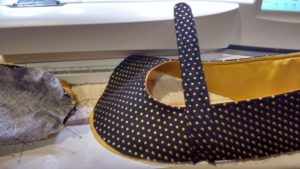
- Side view
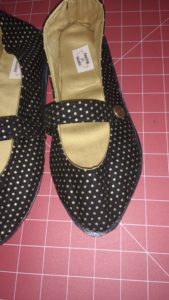
-
- Lining
-

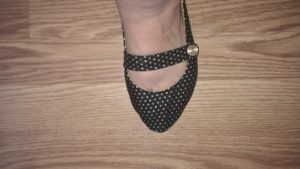
- Close up of button “closure”
-

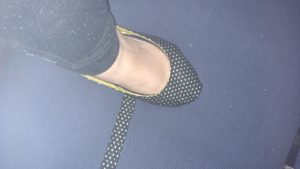
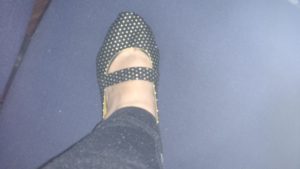
- On my feet.
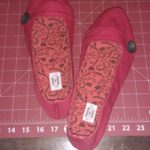
I aimed to spend less than $5 on the test run, so instead of “real” rubber soling material, they are soled with a $1.99 rubber general purpose mat from the automotive section of my local Meijer. The materials are all scraps from previous sewing projects, and the only shoemaking supply I used was 35-40 Durometer Crepe Soling to back the rubber mat and give it some more substance before attaching it to my shoe. These flats are like walking on clouds, and shortly thereafter I tackled another pair. That time, I documented the process. Scroll down to see a gallery of the making of my second pair. I used a metallic print quilting cotton with a vintage cotton sateen lining and Vibram Cherry 4mm soling. The fit across the foot is a little tighter because I moved the strap up, and I do love the weight of the Vibram and how the toe doesn’t seem to curl upward like it did on my test pair.
Making your own shoes is surprisingly easy and enjoyable. Though I regularly make my own patterns and experiment in the sewing room, my entire shoe wardrobe was failing after years of wear and I didn’t really have time. Luckily, there are great resources out there in the DIY community. Here’s what I gathered for my shoe-making arsenal:
- Patterns. I purchased patterns for ballet flats in 5 styles from fellow Etsy seller Living DIY Style. I read most of her blog, and opted to add the Boyfriend Oxford pattern to my cart, too. (And after my first pair was finished, my 5 year old asked if I’d make her some shoes, so this pattern made its way into my stash, too.) There are other patterns on the market, and I haven’t tried them, so I cannot comment on how they compare. Here’s what I like about the patterns I used: It has clear instructions on how to adjust fit, includes multiple sizes and variations, detailed lists of supplies you need and where to get them, and detailed photographic tutorials that walk you through the entire process. I’d never made shoes before, so detail was a must for me.
- Soling. Not knowing if I would make 2 pairs or 20, I did a lot of comparison shopping online and gathered 3 types of soling: 35 Durometer Crepe (which feels like craft foam and wasn’t what I wanted–so I demoted it to insole material or backed rubber mats with it), Vibram Cherry (more expensive, but very nice), and because it was on clearance and I was curious, some remnants of Birkenstock soling (too stiff and thick for ballet flats, in my opinion).
- Fabric. I’m currently failing my self-imposed “sew your stash” challenge, and I bought fabrics that I thought would make cute shoes, including some custom-printed canvas from Spoonflower. In my queue at present: 16th century world map canvas, lobster-print canvas, and Mrs. Pacman canvas. If you sew and have fat-half-sized scraps lying around, you probably have what you need to make a pair of shoes–sturdy fabric is great, but interfacing makes plain old cotton work beautifully.
- Insole material. I actually didn’t get around to researching or purchasing insole supplies because I needed a way to repurpose the disappointing crepe soling material I bought. The Living DIY Style pattern has lots of great suggestions for insoles!
- Stiffener. Interfacing. The pattern suggested Thermolam Plus, so I purchased a few yards from Fabric.com. It adds a lot of body and sturdiness to the shoe upper. There are alternatives listed in the pattern, but having used them in other less structured projects in the past, I’m not sure I’d like the results. The oxford pattern also uses buckram (I keep this around for making hats), and I’m excited to experiment with it on my next pair.
- Glue. For my test pair, I bought a tube of Shoe Goo contact cement at a local retailer. It was exactly enough for a single pair of shoes, and saved me a trip to a real hardware store. If you’re making many pairs of shoes, a quart can is much more cost effective.. But even in a very well-ventilated area, the odor was unbearable. My test pair was still giving off a faint chemical smell a couple of days ago when I put them on! I try to avoid toxins in my home, and while shopping for contact cement in pint or quart size, I discovered a low-odor option. DAP brand makes a Non-flammable, water-soluble (when wet) version of their contact cement. It takes twice as long to dry to the tacky stage, and has a much longer curing time, but I felt it was worth it to avoid the fumes. I was able to clean up with just soap and water (no solvents!), and there was virtually no odor during application. 3 months into wearing, it’s beginning to fail, though, so it may not be the best choice for shoes you’ll wear daily.
- Notions: thread, denim needles, buttons, and clothespins.
The tutorial that comes with the pattern is amazing, so instead of a step-by-step tutorial for making a pair of shoes, I’ve put together a quick photo gallery of my process, just to give you a sense of the time and energy needed for the project. Cutting, stitching, and gluing this pair took me about 3-4 hours including the 45 minute initial dry time for the contact cement. I’m a semi-professional seamstress. If uninterrupted, I’m fairly confident I could finish 2-4 pairs of custom shoes in a single day using an assembly-line approach. A confident beginner should be able to complete a pair in a day!
-
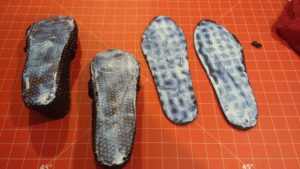
- Soles–tracing the soles and cutting them out with strong scissors is a speedy process. I ended up substituting Vibram for these rubber mat soles after I compared the colors. I’ll just use them on my next pair of neutral-toned shoes.
-

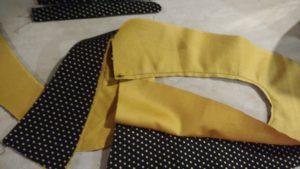
- Fabric–Straps, uppers, upper interfacing, and soles cut out. I use pattern weights instead of pins on most projects to save time.
-
- Once the upper and lining are stitched together, they need to be pressed well.
-
- Topstitching complete on the straps and upper.
-
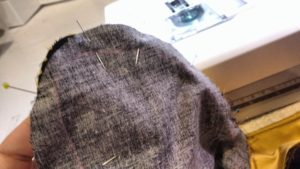
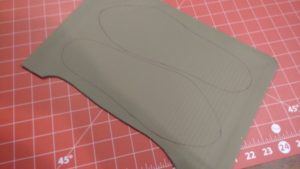
- As per the pattern, I transferred my stitching guide (I adjusted my pattern to include a size 8 width and a size 7 length) to the sole piece. It’s the faint pink chalk line. I pinned carefully and stitched just inside the pink chalk line.
-
- At this point, I do not trim anything–I try the shoe on to make sure it’s a good fit.
-
- And I discovered my strap was too long–it grazes the ground on the button side. So, I used my seam ripper to open a section of the seam and re-stitch the strap after taking 1” off.
-
- Once the uppers were complete, I applied the non-flammable contact cement in an even layer on the shoe bottoms and the soles.
-
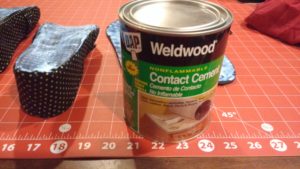
- Here is the cement I used. It takes approximately 45 minutes to dry. When it’s tacky, it’s clear but still shiny.
-
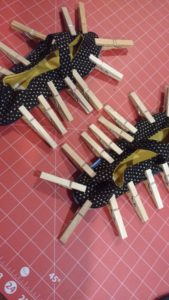
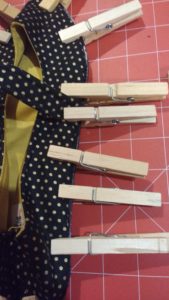
- Very carefully join the shoe and sole. I press firmly and use clothespins to secure the edges all the way around.
-
- My soles are ¼ inch larger or more than my shoes whenever I use the patterns, but that’s okay.
-
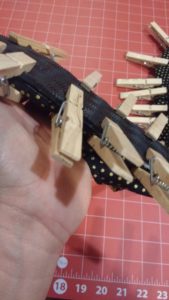
- Checking the seal–I ended up adding additional clothespins in a couple of places. Then, the wait. 24 hours or more to cure and dry fully.
-
- Here is the pair of shoes with the clothespins removed about 36 hours later. You can see how the sole is larger, and the glue is still shiny where it’s exposed. I very, very carefully trim sole with kitchen shears. It’s easy to get too close and cut the fabric of the shoe.
-
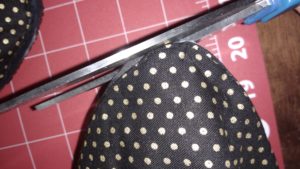
- I very, very carefully trim sole with kitchen shears. It’s easy to get too close and cut the fabric of the shoe.
-
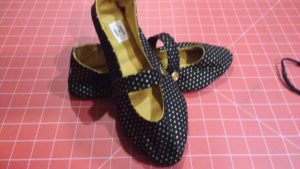
- Finished pair after trimming.
-
- Shoe modeled on a real foot.
Need help? I’m always available for consultation in my Sewing Class Facebook Group. I pin sewing tutorials and pattern hacks on Pinterest, too!

